Grafting grapevines is not mandatory, but it is a highly beneficial practice. It enhances the plant's resilience to environmental stressors and improves the quality and yield of the harvest. Some viticulturists even graft multiple varieties onto a single plant to save space in their gardens.
Grafting can be done in spring, summer, autumn, or even winter. Spring is considered the most favorable season, but if grafting fails during this period or the scion doesn’t take, the procedure can be postponed to summer.
Table of contents
Why Graft Grapevines in August
Grafting improves the quality and hardiness of grapevines. While optional, the procedure offers several advantages:
- Increased plant resilience to environmental stressors. Many large-fruited dessert varieties have low winter hardiness, weak resistance to diseases and pests, and heightened sensitivity to adverse conditions. Grafting these onto hardier rootstocks mitigates these weaknesses.
- Space efficiency. When garden space is limited, multiple varieties can be grafted onto a single vine. This not only yields diverse fruits but also creates a visually striking plant.
- Faster fruiting. A branch from a mature, fruit-bearing plant can be grafted onto a young vine to accelerate production.
- Quick variety replacement. If an existing grapevine no longer satisfies, grafting a new variety onto the old rootstock avoids the long wait for a young plant to mature.
While most gardeners prefer spring for grafting, August is sometimes chosen. Summer grafting typically occurs in three scenarios:
- suitable, well-developed rootstocks or scions were unavailable in spring;
- earlier graft attempts failed;
- spring grafting was missed entirely.
The most common reason is failed spring grafts. To avoid repeating mistakes, consider these potential causes:
- Varietal incompatibility. Rare, as most grape varieties are compatible.
- Extreme temperatures. Excessive heat, cold, or sudden fluctuations hinder success.
- Poor alignment. Mismatched cuts, imprecise joining, or inadequate sealing prevent tissue fusion.
- Drought stress. Grafted vines require more frequent watering.
Grafting can also be done in autumn or winter, but beginners should stick to spring and summer for higher success rates.
Optimal Grafting Periods
For summer grafting, timing is critical—the scion must fuse and mature without premature budding. Well-established grafts will survive winter and flourish with the rootstock by next spring.
Specific timing depends on the method. Bud grafting (oculation) is done in late July or early August. Cleft grafting is performed in June or early July. Underground trunk grafting spans late August to early October or mid-May to early July.
Favorable Dates by Lunar Calendar
Opinions vary on whether lunar phases affect grafting success. Some argue that proper technique matters most, while others swear by aligning with the moon’s cycle.
Preparation
Pre-grafting preparation is essential. Special attention must be paid to the rootstock and scion, as their quality determines graft success.
Rootstock
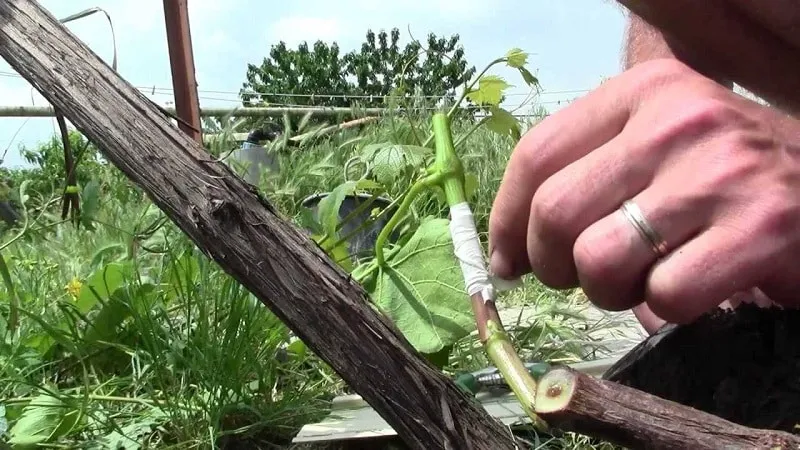
Choose a hardy, disease-free rootstock with robust growth and good turgor. A week before grafting, fertilize the vine and treat it with a copper sulfate solution. Water thoroughly the day before.
Remove excess foliage, dead wood, and misdirected shoots to prevent shading the graft. Strip all leaves from the grafting site.
Note: Pre-grafting, water the vine generously. If no moisture seeps from cuts, repeat watering.
For a full variety replacement, prune all shoots except those designated for grafting, preserving the plant’s structural integrity.
The cut shape depends on the grafting method. Multiple scions can be grafted onto a single branch.
Scion
Select scions from healthy, high-yielding vines with superior fruit quality. Green or woody shoots may be used, but green ones are typical for summer grafting.
Tip: Experienced growers report best results when rootstock and scion have similar maturity levels.
Water and fertilize the donor vine a day before cutting. Collect scions in the early morning or evening to avoid sun stress.
Choose straight, disease-free shoots. Take cuttings from the middle section, 10–15 cm below the tip.
For summer grafting, prepare scions on the same day. If stored briefly, wrap them in damp cloth. Store-bought cuttings should be transported in plastic and soaked in water or growth stimulant before use.
If grafting immediately, no treatment is needed—just place cuttings in water while prepping the rootstock. Otherwise, soak cut ends in growth stimulant and treat the scion with copper sulfate solution (1 tbsp per 10 L water).
How to Graft Grapevines Correctly
Methods vary, but these universal rules improve success:
- Sterilize tools and plants with copper sulfate. Avoid touching cut surfaces; wear gloves.
- Never graft under direct sunlight—it burns tissues and reduces success rates.
- Seal grafts airtight; exposure to air prevents fusion.
- Ensure precise alignment of rootstock and scion cuts for proper tissue bonding.
Tools and Materials
Gather these supplies beforehand:
- A sharp knife (a utility knife, grafting knife, or pruning shears).
- A bucket of water for soaking cuttings.
- Damp cloth for temporary storage.
- Growth stimulants (e.g., "Epibrassinolide," "Liquid Seaweed Extract," or homemade options like honey or aloe vera juice).
- Rubbing alcohol for tool sterilization.
- Copper sulfate for plant disinfection.
- Grafting tape or plastic film for wrapping.
- Gloves.
Step-by-Step Guide
Bud grafting (oculation) is the most common August method. A single bud is attached to a longitudinal cut.
Bud grafting in the "T-bud" style:
- Place the scion in water, cut-end down, until the rootstock is ready.
- Select a healthy rootstock branch. Clear it of leaves and shoots.
- Choose a plump bud on the scion. Make a 3-cm-long, 2.5-mm-deep shield cut around it.
- On the rootstock, remove a bud and make a matching T-cut slightly larger than the shield.
- Insert the bud shield into the T-cut, pressing firmly.
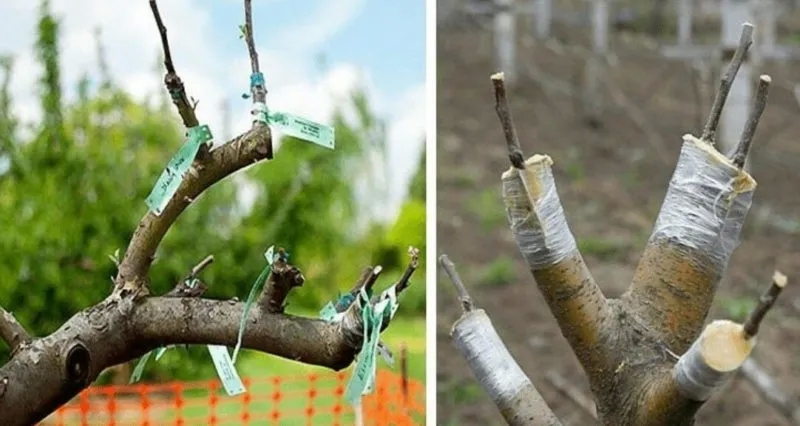
- Wrap tightly with tape, exposing only the bud. Remove tape after 2 weeks.
Repeat to attach multiple buds. For uniform cuts, align buds on both branches and make simultaneous cuts.
Grafting Methods
Several techniques exist, each with nuances.
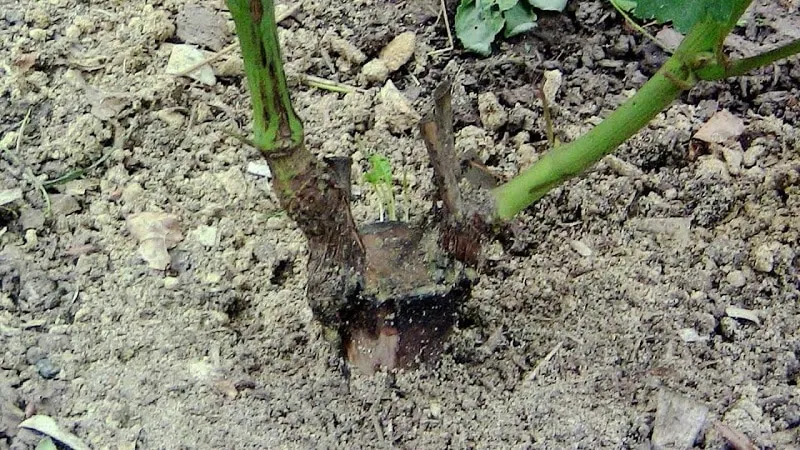
Root Grafting
Used to rejuvenate vines or replace varieties, leveraging an established root system.
Typically done in mid-spring but possible in late summer. Uses the cleft method.
Steps:
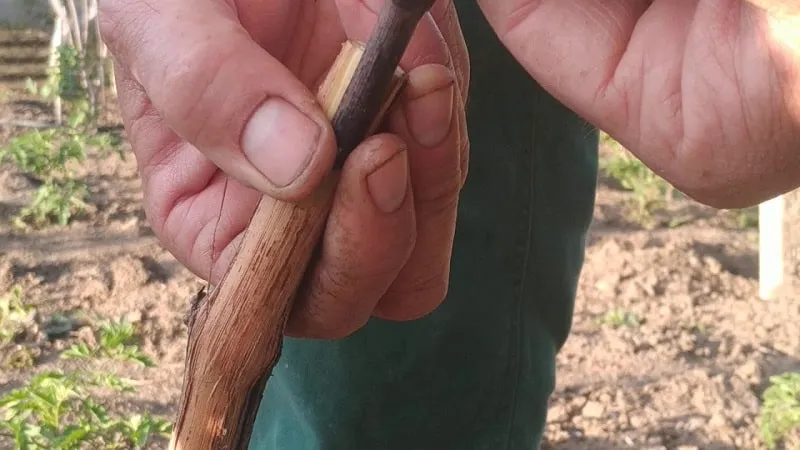
- Prepare pencil-thick, mature cuttings (not green) with 2–3 buds.
- Cut a 30-cm section from the vine tip at a 45° angle. Discard the tip. From the remaining vine, cut a 12–15 cm "chubuk" with buds.
- Whittle the chubuk’s base into a 3-cm wedge.
- Soak in water or stimulant while prepping the rootstock.
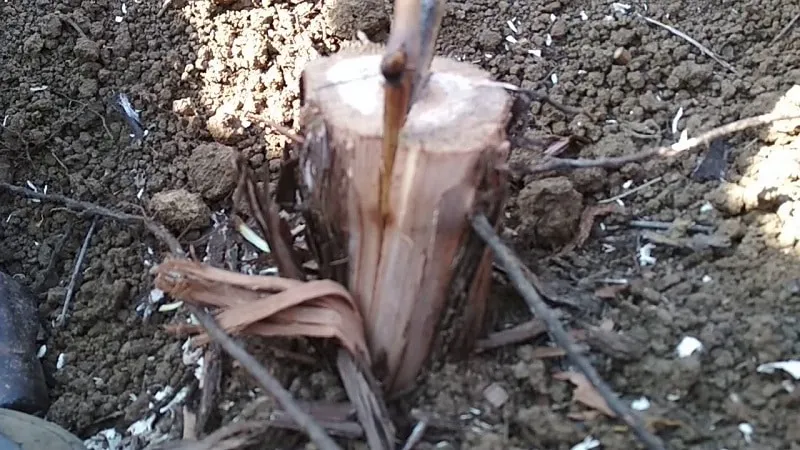
- Dig a 10–15 cm hole around the root crown. Trim the vine’s top.
- Split the rootstock vertically to match the wedge depth.
- Insert the wedge. For thick rootstocks, multiple scions can be added.
- Seal with grafting tape.
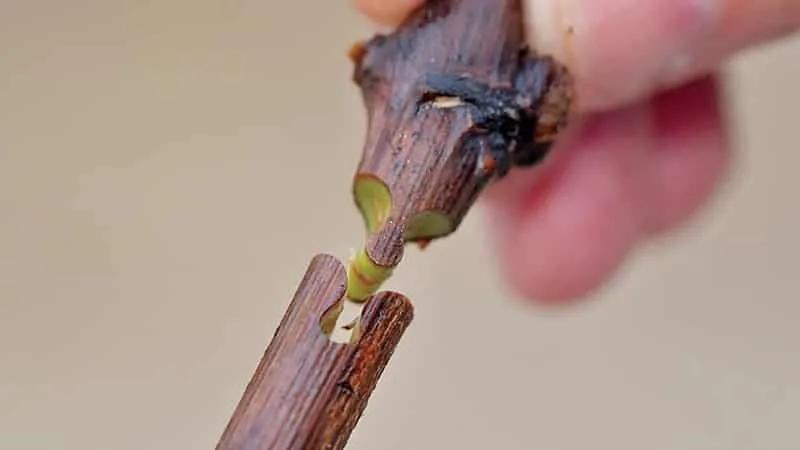
Cleft Grafting
Ideal for beginners. No need to shape the rootstock precisely—just create a cleft and insert a wedge.
Three variants:
- Green-to-green: Done in June/July. No soaking needed—just wedge-cut the scion, cleft the rootstock, join, and wrap.
- Woody-to-green: Late May/early June. Soak woody cuttings until buds swell, then treat with stimulant. Cleft the green rootstock, insert the wedge, and seal.
- Woody-to-woody: Late August/early September. Prepare as above, graft onto mature wood, and wrap tightly.
Other Budding Techniques
Beyond T-budding, try these:
- Inverted T-cut: Similar to T-budding but upside-down.
- Patch budding: A rectangular bark patch is replaced with a bud shield.
- Flap budding: Create bark flaps at a node, insert the bud, and close.
Post-Graft Care
Proper aftercare ensures success:
- Water deeply post-grafting and mound soil. Loosen the ground. Fertilize after a week.
- Maintain consistent moisture until grafts fuse.
- Check grafts every 10 days. Remove tape once healed.
- If grafts fail within a month, retry in autumn or next spring.
Pro Tips
Expert tricks for better results:
- Add 1 tsp honey to the soaking solution to boost tissue fusion.
- Wrap fingers in two layers of medical tape to prevent cuts.
- Some skip prolonged soaking, submerging cuttings for just hours.
Conclusion
While spring is the preferred grafting season, summer offers a second chance. Multiple straightforward methods exist—success hinges on proper technique and timing.