Apricot is a heat-loving yet undemanding crop that thrives even in temperate regions of Europe. It can be propagated not only through cuttings and root suckers but also from pits. Even if it grows into a wildling, the tree will still produce tasty, albeit smaller, fruits. These are suitable for both processing and fresh consumption.
Growing apricots from pits takes longer than using cuttings. However, such trees are more resilient to environmental stressors and require less attention. That’s why beginner gardeners often choose this planting method. Let’s explore how to grow an apricot sapling from a pit at home.
Table of contents
Can You Grow an Apricot from a Pit?
Apricot pits can be germinated both outdoors and indoors. This propagation method is more time-consuming than vegetative techniques. The latter is better suited for those with large gardens—if space allows, you can grow multiple saplings and later select the strongest ones.
Note: Roasted apricot pits or seeds from compote are unsuitable for planting—their kernels are no longer viable.
If space is limited, it’s better to buy a ready-made grafted sapling. It will reach fruiting age faster and produce delicious fruit.
Advantages of growing apricots from pits:
- Accessibility of planting material. Pits can be collected from fallen fruits. Apricots are sold at markets and are cheaper than saplings or cuttings.
- Room for experimentation. Pits may yield a variety different from the parent plant—sometimes even an improvement.

- Quality assurance. Unscrupulous sellers often offer weak, diseased, or root-damaged saplings. Growing from pits ensures healthy plants.
- Hardiness. Apricots grown from pits are more frost-resistant and adapt better to local conditions (humidity, drought, wind, etc.).
- Strong immunity. They develop resistance to diseases common in their growing region.
- Better shape. Trees grow more aesthetically pleasing than those from cuttings.
- Excellent rootstock. These trees make sturdy rootstocks for grafting.
Despite these benefits, many gardeners prefer cuttings. Generative propagation has drawbacks:
- Unpredictable results. The outcome may retain parent traits, mix with other varieties, or revert to a wild form.
- Delayed fruiting. Such trees bear fruit 2–3 years later than grafted ones.
- Grafting may be needed. To ensure fruit quality and speed up production, grafting is often necessary.
- Time-consuming. Growing from pits takes much longer than from cuttings.
Even wild apricots are useful—they produce abundant small but flavorful fruit, ideal for preserves.
Planting Time
Most apricots fruit by July, when pits are harvested. Planting immediately isn’t advisable—they won’t germinate without stratification.
Pits require 3–4 months of cold treatment. Start in November for indoor planting by late February or early May, when daylight is sufficient.
Selecting and Preparing Pits
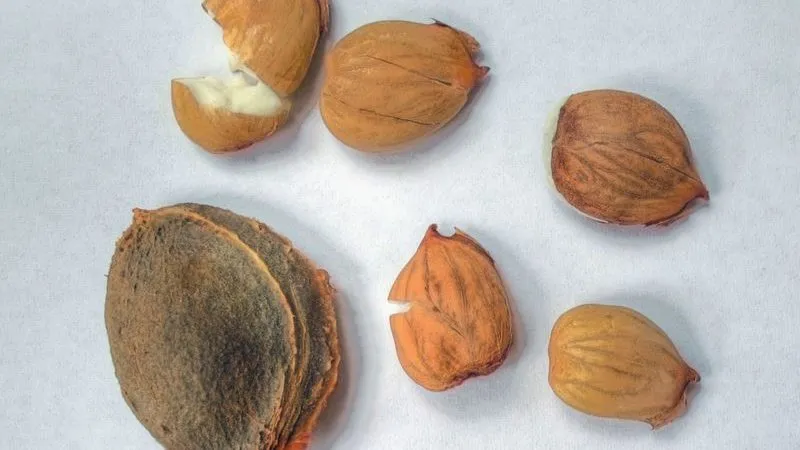
For strong, fruitful saplings, proper pit selection is key. Consider these factors:
- Origin. Collect fruit yourself or source pits from gardeners in similar climates. Avoid supermarket apricots—they’re often picked unripe. Farmers’ markets are a better option.
- Ripeness. Use fully ripe or overripe fruit—ideally fallen, cracked but not rotten.
- Appearance. Choose uniform, blemish-free fruit without spots, holes, or mold.
- Taste. Sample flesh and pits—sweet, aromatic fruit promises good future harvests.
- Pit quality. Select smooth, evenly colored pits—avoid cracked or misshapen ones.
- Variety. Opt for locally adapted cultivars. Northern gardeners should avoid heat-loving varieties. Hybrids aren’t suitable for pit propagation.
Preparing selected pits:
- Cleaning. Remove all flesh under running water—residue promotes bacterial growth.
- Disinfection. Soak pits for 30 minutes in a light potassium permanganate solution to prevent fungal infections.
- Drying. Pat dry with paper towels and store in breathable bags at +12…+20°C, humidity below 50%.
Avoid kitchen or fridge storage—temperature fluctuations and moisture damage kernels.
Stratification
Stratification mimics winter conditions, hardening pits and triggering germination. The process takes 90–100 days.
Step-by-step:
- Soak pits for 3 days in room-temperature water—first in potassium permanganate, then plain. Change water every 12 hours.
- Layer sterilized sand in a container, add pits, and cover with peat-garden soil mix.
- Mist the soil and store at 0…+5°C (fridge, cellar, or buried outdoors in mild climates).
Note: Ready pits split open, revealing sprouts.
Planting Apricot Pits in Pots
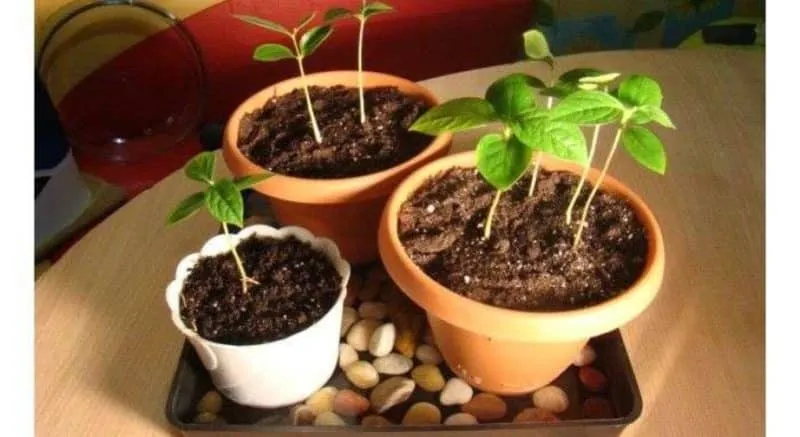
Planting apricot pits at home is straightforward but requires preparation.
Use shallow trays—deep containers encourage excessive root growth at the expense of shoots. Prepare soil from compost, garden soil, and sand (1:2:1). Sterilize soil and drainage (gravel, broken ceramics) by baking or with potassium permanganate solution.
Step-by-Step Guide
How to plant apricot pits:
- Fill containers with 3–5 cm drainage, then soil (leave 3 cm to rim).
- Moisten soil, make 3 cm-deep furrows 5 cm apart. Space pits 3 cm apart.
- Cover with soil, lightly tamp, and water with room-temperature water.
- Cover with plastic wrap and place in a cool, bright spot.
Common Mistakes
Avoid these errors for healthy saplings:
- Skipping stratification—pits won’t accumulate nutrients and won’t sprout.
- Using old pits—fresh ones have higher germination rates.
- Planting too deep—delays or prevents sprouting.
- Insufficient light—causes weak, leggy growth.
- Overwatering—leads to rot and fungal diseases.
Care for Potted Apricot Seedlings
Ensure optimal conditions for healthy growth:
- Maintain humidity with plastic cover until sprouts appear, then gradually remove it.
- Water when soil dries—use room-temperature water to avoid shocking plants.
- Transplant to individual pots after third leaf appears, keeping root ball intact.
- Rotate pots every two days for even growth.
- Harden off seedlings before transplanting—start with 30 minutes outdoors, increasing daily.
- Fertilize biweekly with alternating organic and mineral feeds after watering.
Transplanting to the Garden
Move saplings outdoors in autumn or early spring after snow melts (with prior hardening).
Important! Choose a sunny spot with groundwater at least 1.5 m deep.
Prepare soil in advance—clear weeds, dig holes 20 cm deeper/wider than pots. Mix excavated soil with sand, compost (10 L each), 35 g superphosphate, and 25 g potassium fertilizer. Add 10 cm drainage and 10 cm soil mix to each hole. Transplant with root ball intact, backfill, water, and mulch.
Ongoing Care
Young apricots need attention to survive winters.
Care guidelines:
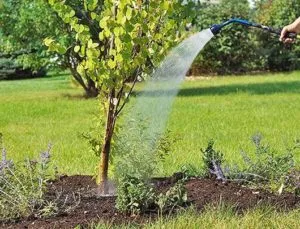
- Watering. Monthly in the first year (1 bucket per plant if no rain). Mature trees need up to 6 buckets.
- Fertilizing. If soil was prepped well, feed only after 3 years—annual autumn compost (10 L) and ash (1 kg).
- Soil care. Loosen after watering to prevent crusting.
- Pruning. Shape in year two (keep 4 branches per tier). Remove dead wood annually.
- Winter prep. Clear debris, mound soil high around trunks, wrap young trees in insulating fabric.
Direct Outdoor Planting
Experts recommend sowing pits directly in gardens—resulting trees are hardier.
Summer planting isn’t advised—rodents may steal pits. Late autumn (pre-frost) is ideal—natural stratification occurs, and sprouts emerge stronger by next winter.
Prepare soil by digging in compost (10 L/m²), superphosphate (35 g), and potash (20 g). Add lime if soil is acidic. Make 10 cm-deep trenches, add 5 cm organic matter (grass, peat), space pits 5 cm apart, cover with soil, mulch with peat, and water.
Grafting Apricot Seedlings
Grafting isn’t mandatory—wildlings produce edible fruit. However, it improves flavor and speeds up fruiting.
Use 2–3-year-old pit-grown trees as rootstock and scions from fruiting cultivars. Graft in spring.
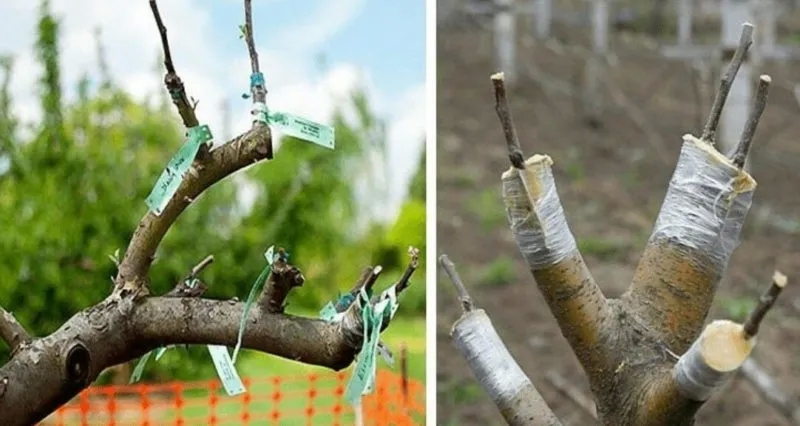
Simple cleft grafting:
- Cut a scion with 3–4 buds, trim leaves, and shape a 3–4 cm wedge at the base.
- Split rootstock center to match wedge depth.
- Insert scion, aligning cambium layers.
- Wrap with grafting tape, seal cuts with pruning wax.
- Remove tape after successful union.
Expert Tips
Seasoned gardeners recommend:
- Sow densely—some pits won’t sprout. Thin weak seedlings later.
- Speed up stratification by freezing pits intermittently during cold treatment.
- Mulch heavily over first winter for outdoor-sown pits.
Conclusion
Growing apricots from pits at home is possible, but experts often recommend direct outdoor sowing for hardier trees. Fewer may sprout, but they’ll withstand winters better.
With proper pit preparation, planting, and care, cultivating apricot saplings is achievable for any gardener.