Cherry tomatoes are especially popular due to their vibrant taste and rich nutritional profile, which contains a higher concentration of beneficial compounds and vitamins compared to larger tomatoes. That’s why more and more gardeners are growing these small, flavorful tomatoes in their gardens.
If you live in an apartment and don’t have a garden plot, that doesn’t mean you can’t grow tomatoes. Breeders have developed numerous dwarf varieties and hybrids that thrive and ripen perfectly in pots. One of them is the Pinocchio tomato. Read on to learn how to care for this variety on your windowsill or in your garden.
Table of contents
Variety Description
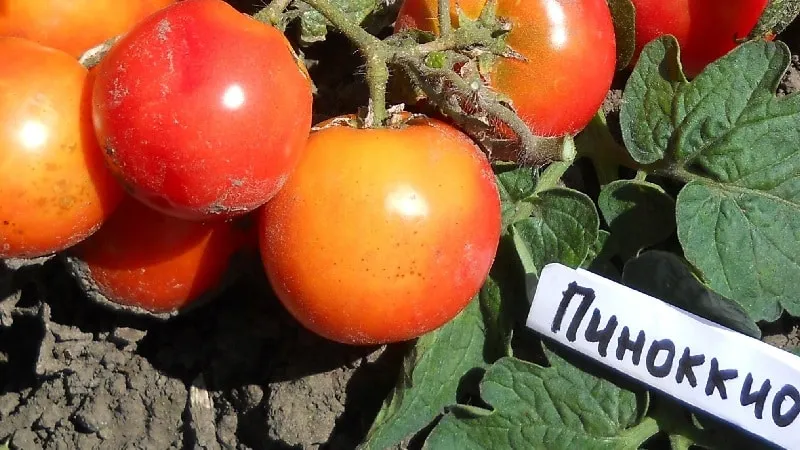
The Pinocchio tomato is a dwarf variety of tomato. Its compact size allows it to be grown not only in gardens but also on windowsills and balconies, while still yielding a generous harvest of cherry tomatoes.
Key Features of Pinocchio
The main feature of the Pinocchio variety is its dwarf growth, which gives it a decorative appearance. You can see this for yourself in the photos below.
Interesting fact! Pinocchio tomatoes are often grown in flower beds. When the fruits form, the bushes look highly decorative, with their greenery almost hidden beneath clusters of bead-like tomatoes.
The fruits are juicy but not watery. They contain an increased concentration of nutrients—100 g of Pinocchio tomatoes provides the daily recommended intake of iron, potassium, and vitamins B, C, and A.

Characteristics of the Dwarf Tomato
Growing Pinocchio tomatoes is not difficult, as they are low-maintenance.
Description and characteristics of the Pinocchio variety:
| Parameter | Indicators |
| Bush type | Determinate. Growth stops once the topmost fruit sets. Maximum height: 40 cm. The bushes are sturdy, well-leafed, and spherical in shape. Leaves are dark green, resembling potato foliage. The root system is weak. |
| Growing method | Suitable for greenhouses, open ground, pots, and containers. |
| Yield | High—1-1.5 kg per bush. Yields are lower when grown in pots. Up to 10 bushes can be planted per square meter, yielding up to 12 kg of fruit. |
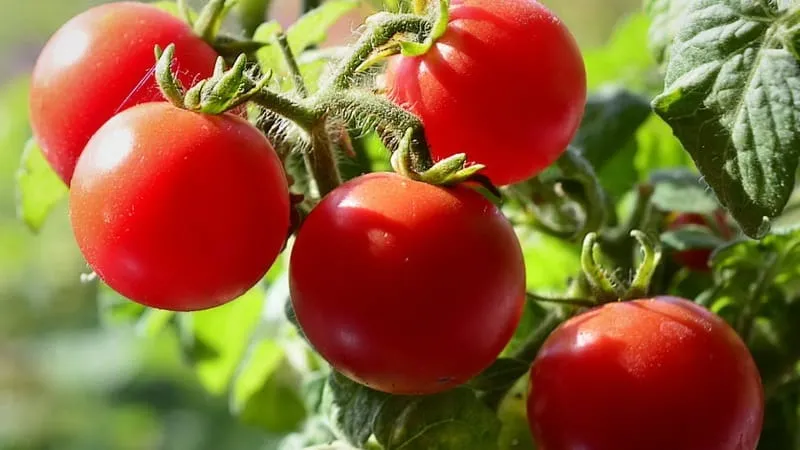
| Fruit | Miniature, round tomatoes weighing up to 40 g each. No ribbing at the base. The taste is sweet with a slight tang and fruity aftertaste. Each fruit contains 2-3 seed chambers. Fruits grow in clusters of 10. |
| Transportability | High—the skin is thin, glossy, and durable. Fruits can be stored for up to a month. |
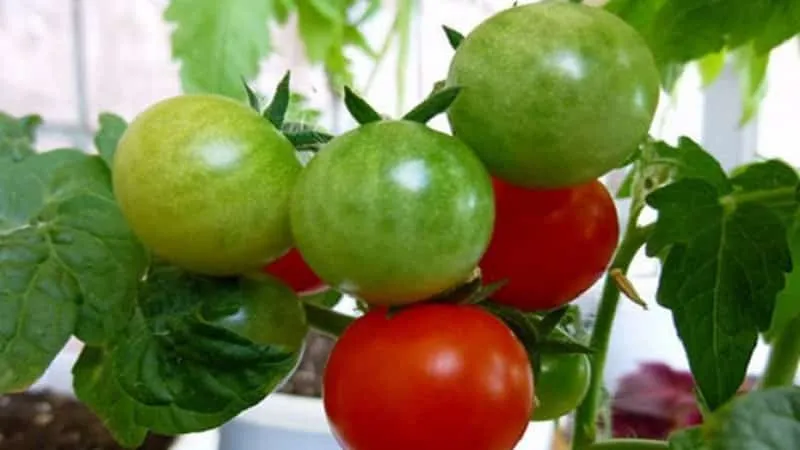
| Ripening time | Mid-season—fruits ripen 90 days after germination. All berries mature almost simultaneously. After fruiting, the bush dies. |
| Disease resistance | High immunity to common tomato diseases. Due to early ripening, it is not affected by late blight. |
Note! In European registries, Pinocchio is listed as a mid-season variety. However, many seed producers market it as an early-maturing variety, with fruits ready in just 90 days after sprouting.
Seedling Growing Guidelines
Like other tomatoes, Pinocchio is grown from seedlings. Even when cultivating them indoors, seeds should not be sown directly into large containers, as this reduces yield.
Seeds are sown 60 days before the intended transplanting date. Preparations typically begin in early May.
For indoor growing, seeds can be planted at any time of year—even in winter.
Seed Preparation
According to gardeners, Pinocchio seeds have nearly 100% germination. Nevertheless, pre-sowing preparation is recommended.
To test viability, soak seeds in saline solution for 30 minutes. Discard floating seeds and use the sunken ones.
Some producers pre-treat seeds with disinfectants, indicated by green or orange coloring. If untreated, soak seeds in a light pink potassium permanganate solution for 30 minutes.
Before planting, treat seeds with a growth stimulant. Soak gauze in the solution, wrap seeds in it, and leave for the recommended time.
Popular European growth stimulants:
- BioBloom;
- RootJuice;
- Alg-A-Mic.

Choosing Containers and Soil
For sowing, use large plastic trays, wooden boxes, or homemade containers. If growing just a few plants indoors, peat pellets are convenient.
For transplanting seedlings, use small individual pots—peat or plastic cups work well.
For mature plants on balconies or windowsills, use pots or containers of at least 2 liters. Wooden boxes are also suitable—up to 10 plants per square meter.
The best soil mix is equal parts turf, peat, and compost, with a cup of ash per container. Sterilize soil and containers by baking or pouring boiling water over them.
Sowing Seeds
Make 1 cm-deep furrows in the soil, spaced 3 cm apart.
Place seeds 2 cm apart in the furrows, cover with soil, and lightly water. Do not compact the soil.
Cover with film and place in a warm spot. No watering is needed until germination.
Seedling Care
Follow these key care steps for healthy seedlings:
- After germination, move seedlings to a well-lit area. Use grow lights if needed.
- Remove the film after a week. Room temperature is ideal.
- Water seedlings carefully with a pipette or syringe before transplanting. After transplanting, use a watering can with warm, settled water.
- Avoid damaging roots during transplanting. Pinocchio has a delicate root system—do not prune the central root.
- Fertilize with phosphorus-rich formulas. First feeding: 14 days after transplanting, then every two weeks, and finally 3 days before moving outdoors.
- Harden seedlings two weeks before transplanting by gradually increasing outdoor exposure.
How to Grow Tomatoes
Transplant Pinocchio tomatoes outdoors in mid-May. They thrive in both open and protected ground.
Some gardeners plant dwarf bushes as borders around other tomato varieties or flower beds. Their compact size makes them ideal for mixed planting. They also grow well in patio containers.
Transplanting Seedlings
Prepare the soil in autumn by tilling and enriching it with ash and compost. Remove all plant debris.
In spring, till again and disinfect with a weak potassium permanganate solution.
Water and fertilize seedlings 2-3 days before transplanting.
On planting day, dig holes spaced for 7-8 plants per square meter. Some prefer denser planting—up to 10 plants per square meter.
Add a tablespoon of ash to each hole. Place seedlings inside without deep burying.
Water each hole with warm water before covering with soil.
Plant Care
Follow these key care tips for a bountiful harvest:
- No pruning or staking is needed. Abundant fruiting comes from multiple clusters. Remove yellow leaves weekly.
- Water when the soil dries—typically 2-3 times per week, in the evening.
- Fertilize regularly. First feeding: 3 weeks after transplanting, then every two weeks until flowering. Alternate mineral fertilizers with diluted manure. Foliar sprays are beneficial during fruiting.

Special Care Tips
Consider these nuances for optimal growth:
- Tomatoes benefit from soil aeration. Loosen soil after each watering, avoiding root damage.
- Use settled water (24+ hours) for irrigation—never straight from the tap.
- Avoid wetting foliage—water at the base only.
- Weak roots are vulnerable to weeds. Weed weekly to prevent competition.
Pests and Diseases
Pinocchio is resistant to most tomato diseases, including late blight, due to its short growing season. Only seed and soil disinfection are needed for prevention.
Possible pests include aphids, slugs, and Colorado beetles. Roots may be attacked by wireworms.
Remove pests manually. Prevent infestations with soap sprays (1 grated soap bar per 10 L water) or chamomile/celandine decoctions. Apply to leaves, not soil.
Growing in Greenhouses vs. Outdoors
Greenhouse cultivation is straightforward—just ventilate daily.
Outdoor growing requires more care. Cover seedlings at night for the first week. Mulch beds to protect against pests and cold.
For balcony growing, use ≥2 L pots. Water daily in small amounts and aerate soil daily. In winter, supplement with grow lights.
Important! Pinocchio has a short lifecycle—plants wither after fruiting. Replace them promptly for continuous harvests.
Harvesting and Usage
Fruits ripen by early July, almost simultaneously.
Harvest whole clusters (8-10 fruits each). They store best unseparated, in fridge containers.
Perfect for fresh eating, canning, or sun-drying due to their intense flavor.
Pros and Cons
 Advantages:
- Early maturation;
- High yields;
- Low maintenance;
- Adaptability to gardens, greenhouses, and containers;
- Excellent flavor;
- Nutrient-dense;
- Versatile use;
- Uniform ripening;
- Disease resistance.
Drawbacks include a short lifespan and delicate roots. No other significant cons.
Grower Testimonials
Pinocchio tomatoes receive glowing reviews for their productivity and ease of care.
Sophie Laurent, France: “I grow Pinocchio outdoors as border plants. They fruit earliest without shading other crops. The tomatoes taste fantastic in salads.”
Thomas Müller, Germany: “With no garden, I tried growing Pinocchio on my windowsill. Now I harvest ~1 kg per plant year-round!”
Conclusion
The Pinocchio variety offers compact cherry tomatoes on dwarf bushes (≤40 cm tall) that need no staking or pruning. Their disease resistance and adaptability to containers make them perfect for urban and traditional growers alike.